Transferring photos from a PC or laptop to an iPhone is easy when you know how – and you don’t need to use the dreaded iTunes either
Table of Contents
How to transfer photos from PC to iPhone in 2021
Overview
There are a number of ways to transfer photos stored on your PC to your iPhone. The best is way is to utilise iCloud, Apple’s cloud storage service, but without a dedicated app for Windows, how do you do it? Here, we explain how you can use iCloud Photo Library, Apple’s photo syncing service, to transfer your photos from a Windows PC to an iOS device.
Using iCloud to transfer photos won’t cost you a penny if you haven’t used up your 5GB free iCloud allocation. If your photos push you over that 5GB limit, when trying to enable iCloud Photo Library in Settings > Photos on your iPhone or iPad, you’ll see a message saying you don’t have enough storage to use it.
In that case, you will have to pay for extra iCloud storage. And at 79p ($0.99) per month for 50GB, it’s a small price to pay for convenience.
Anyway, here’s how to transfer photos to your iPhone from your PC using iCloud and a couple of alternatives.
How to transfer photos from PC to iPhone using iCloud
Apple uses iCloud, its cloud storage and syncing service, to make sure that the photos you take on your iPhone are readily available on both your computer and iPad.
It’s a useful service to have, and negates the need for cables and syncing, but what about if you wanted to put photos FROM your computer ONTO your iPhone? Is that possible? Of course it is – but the method depends on the software you use.
If your devices are running iOS 8 or later, which they certainly should be in 2021, you can manage and upload your photo library via the iCloud website. Here’s how to do it:
- Open your browser on your PC, navigate to iCloud.com and log in with your Apple ID.

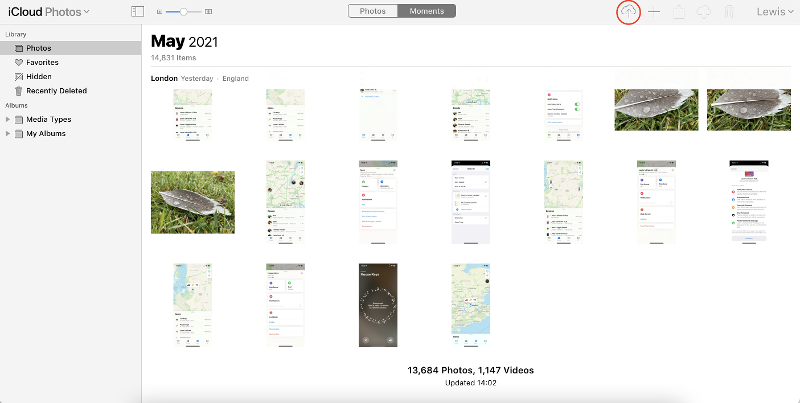
- Click the Photos icon on the top row of apps. If this is the first time you’ve accessed your photo library from a browser, you’ll have to go through a first time setup.
- Click the Upload button in the top-right of the page and browse your PC for the photos you want to add to your iPhone. If you want to select multiple files at once, hold CTRL and click each photo.
- Once you’ve selected the photos, click Open/Choose and they’ll be uploaded to your iCloud Photo Library. If you look at the bottom of the page, you’ll see a progress bar – the process is usually pretty quick, but this can depend on the number of photos you want to upload.

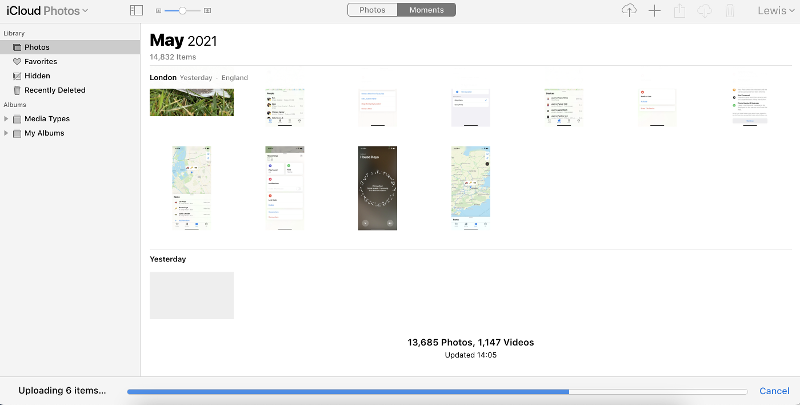
You’re done! Once the photos have been uploaded to your iCloud Photo library, they should soon appear within the Photos app on your iPhone (as long as iCloud is enabled and it’s connected to Wi-Fi).
It’s worth noting that photos will be displayed in chronological order, so if you add photos that were taken in March, you’ll have to scroll back to March to find them.
Alternative: Third-party cloud storage
One option, if you don’t mind having your photos in a different app to the stock Photos app, is to use a cloud storage service such as Dropbox, OneDrive, Google Drive or any of the other alternatives we recommend in our best cloud storage services roundup.
Once you install the app on your iPhone, you’ll have access to all the files in your cloud account. Most allow you to mark files you want available offline, and you can save photos and videos directly to your Photos app too, so you don’t need to always have an internet connection.
It’s easy to upload photos stored on your PC to the likes of Dropbox and Google Drive. You can then view them on your iPhone, download them or share them with friends.
Read more :