If you’d like to use the images attached in PDF files somewhere else, you can extract the images and save them to a folder. We’ll show you how to copy images from PDF Files on Windows 10 and Mac.
Table of Contents
How to Copy Images from PDF Files
Overview
An easy and free way to extract images from a PDF is by using the Adobe Acrobat Reader DC app. With this app, not only can you open PDFs, but you can also extract their multimedia content. This way, you can save select images from PDF to a folder on your computer.

Copy Images from a PDF files with Adobe Acrobat Reader DC
If you haven’t already, download and install the free Acrobat Reader DC app for Windows 10 or Mac. Then, open your PDF with this app.
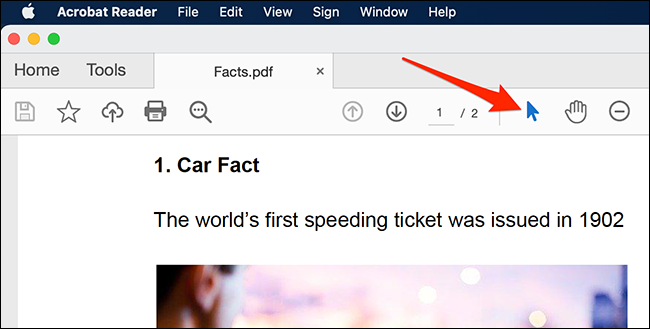
When the Acrobat Reader opens, click the selection tool (an arrow icon) in the toolbar near the top of the window. You’ll use this tool to select images in your PDF.
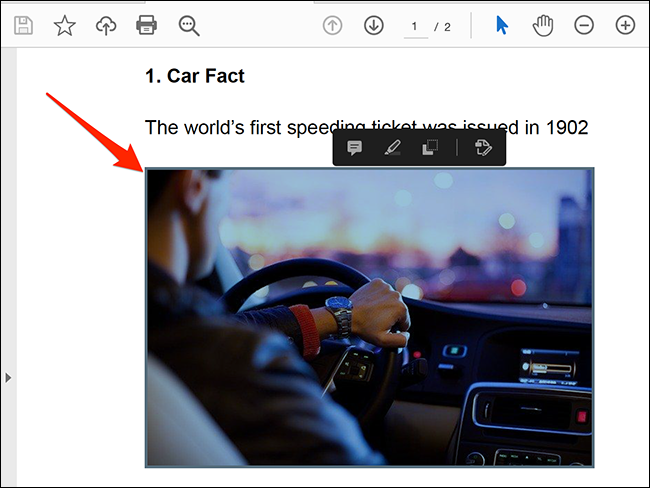
Next, scroll to the page in your PDF where the image that you want to extract is located. Click the image to select it.
Next, right-click the image and select “Copy Image” from the menu.
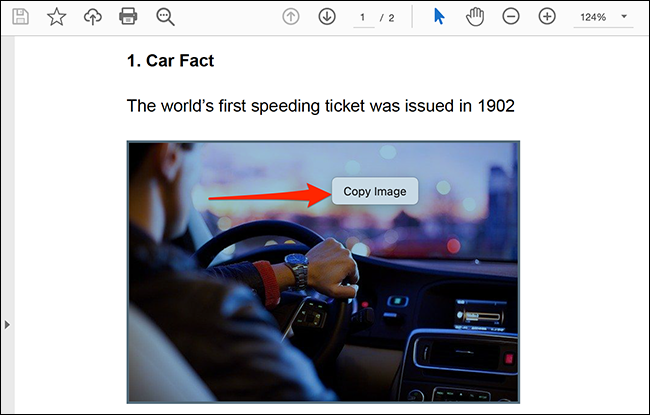
The selected image is now copied to your clipboard. You can now paste this image into any image editor on your computer.
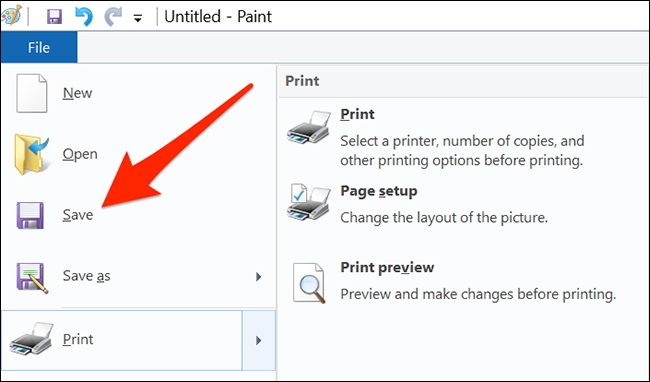
If you’re a Windows user, open the Paint app and press Ctrl+V to paste the image. Then, click File > Save in Paint’s menu bar to save the image.
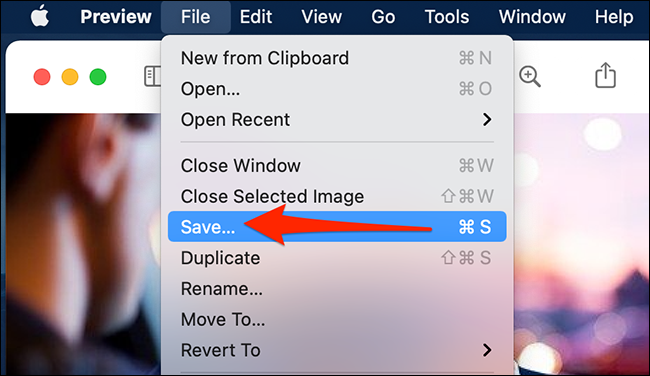
On Mac, open the Preview app and select File > New from Clipboard from the menu bar. Then, click File > Save to save the image.
Your saved image file works like any other image on your computer. You can add it to your documents, upload it to websites, and more.
Use Adobe Photoshop to Extract Images from a PDF
Photoshop offers a custom feature to import the contents of a PDF file. With this, you can load your PDF and extract all of the images from it.
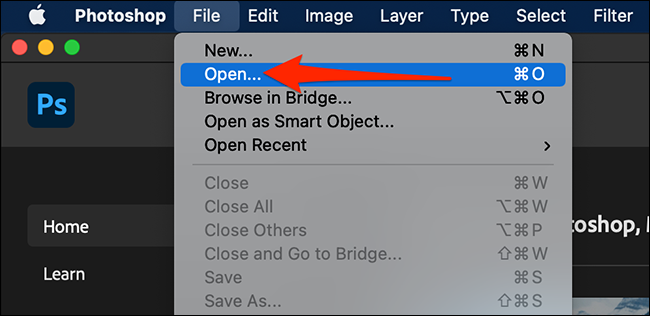
To use this method, first, open Photoshop on Windows 10 or Mac. In Photoshop, click File > Open in the menu bar and browse to open the PDF file that you want to extract images from.
Photoshop’s “Import PDF” window will open. In this window, select the “Images” radio button at the top to view all of your PDF images.
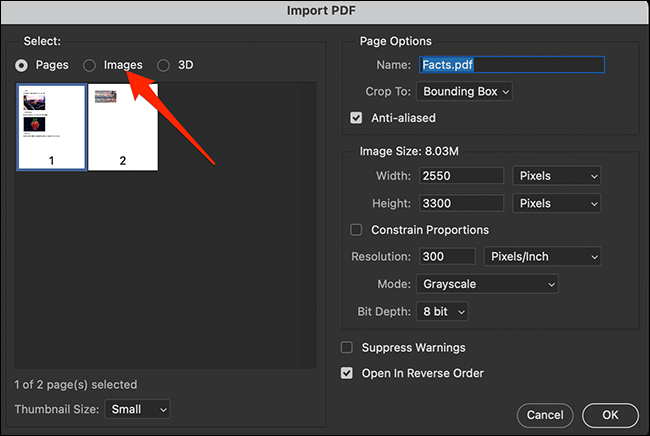
Photoshop will display all of the images in your PDF files. Click the image that you’d like to extract. To select multiple images, press and hold down Shift, and then click the images.
When you’ve selected the images, click “OK” at the bottom of the window.
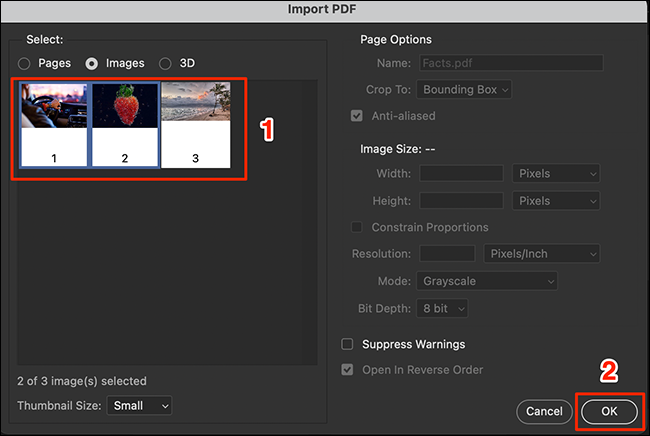
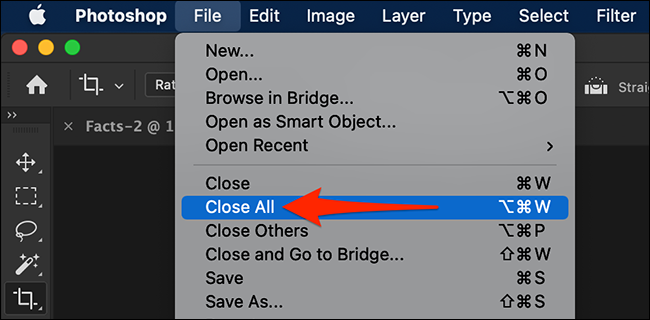
Photoshop will open each image in a new tab. To save all of these images to a folder on your computer, select File > Close All in Photoshop’s menu bar.
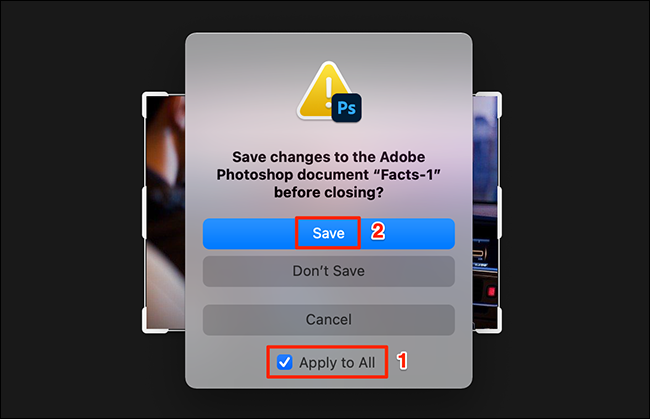
Photoshop will ask if you want to save changes to your images. In this prompt, enable the “Apply to All” option, and then click “Save.”
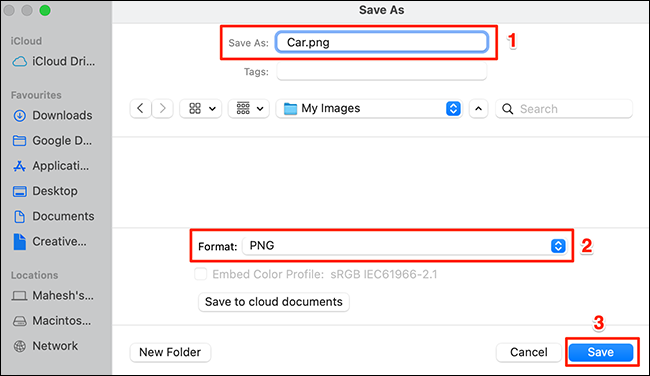
Next up is Photoshop’s standard “Save As” window. Here, at the top, click the “Save As” box and enter a name for your image. Then, click the “Format” drop-down menu and select a format for your image. Finally, click “Save” at the bottom of the window. This step must be followed for each image.
As for the image format, if you aren’t sure what to choose, select “PNG,” as it works in most cases.
Now, the images that you selected are free from their PDF prison!
RELATED: How to convert Onenote to pdf files

